
Windows operating system is always a trove of precious memories and important working files. The last thing you would want to happen is for these crucial contents to disappear. Now, it’s time to backup Windows 11/10 and keep all your data safe.
Why Should You Backup Windows 11?
One of the most common mistakes you might experience is losing the contents of your PC due to unforeseen circumstances like malware attacks, failing hard drives, or system crashes. But if you take the necessary precautions to backup Windows 11/10, you can rest assured that everything will be fine.
It's heartening to see that computer users' awareness of backup has been increasing in recent years. However, there are some people who are not proficient in computers and are confused about how to back up their data. Fortunately, we know a thing or two about carrying out this task. Keep reading the following paragraph.
How to Create a Windows 11 Backup with MiniTool ShadowMaker?
You must be just as confused as I am about how to choose the most suitable backup software from the numerous options available in the store. Perhaps you could consider the free backup software - MiniTool ShadowMaker that I chose.
MiniTool ShadowMaker is often referred to by users as the best backup software. It fills in the gaps of Windows inbuilt backup functions and comes with more advanced, extensive, and sophisticated features.
It’s worth noting that the robust program supports system backup, disk backup, partition backup, file sync, disk cloning, etc. What’s more, its Media Builder feature enables you to create bootable media. When the system crashes, you can boot the PC from this media and backup files. Don't miss out on the 30-day free trial.
Take a look at the step-by-step demonstration of this wonderful software to backup Windows 11.
Step 1. Connect your external drive to your machine.
Step 2. Download, install, and launch MiniTool ShadowMaker and click Keep Trial to enter its homepage.
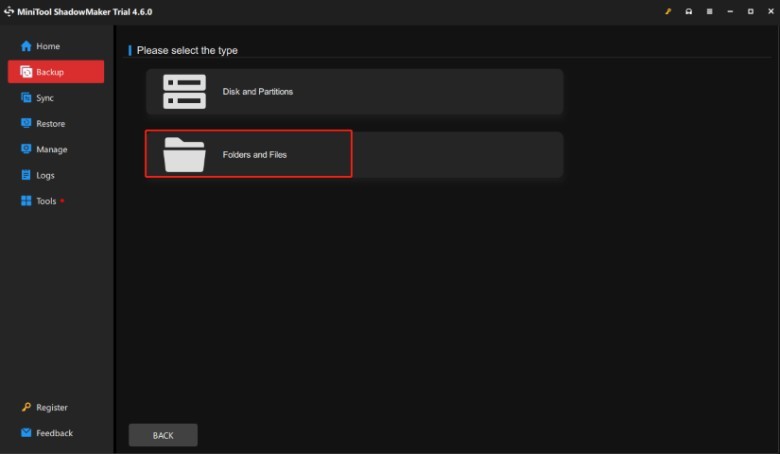
Step 3. Head to the Backup page and as you can see, this tool has chosen system partitions by default.

To back up files in Windows 11, hit the SOURCE section > select Folders and Files to choose the content you desire to save.
Step 4. Click on DESTINATION > choose an external hard drive, USB drive, or even network drive to save the system image files.
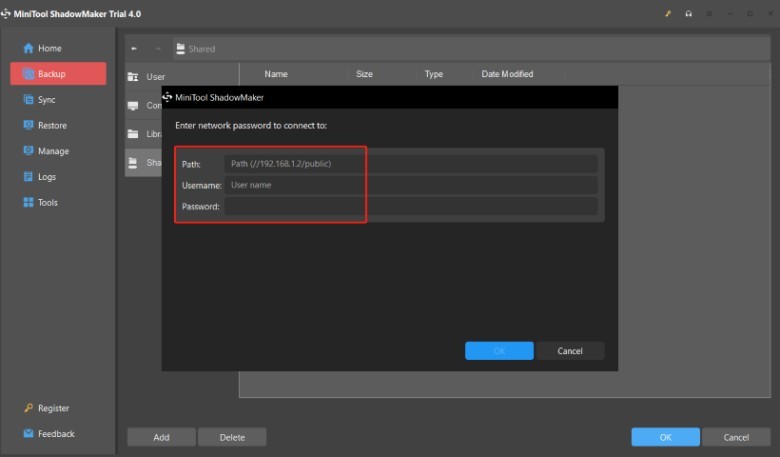
If you want to save them in network drive, then you need to go to the Shared tab and click Add at the left bottom. Enter your network drive’s path and username and password > click on OK.
Step 5. Go to Options at the bottom right and configure some advanced parameters, backup schemes, and backup schedules.

Backup Options – set a compression level to the current backup task for less file size, exclude some unnecessary items from a backup, and add password protection.
Backup Schemes - manage disk space usage by setting a scheme like full backup, incremental backup, or differential backup.
Schedules Settings – configure a specific point-in-time of a day, week, or month to back up automatically.
Step 6. Click Back Up Now to initiate the backup task.
How to Backup Windows 11 Using Windows Built-in Backup Tools
Actually, Windows comes with two free backup tools: File History and Backup and Software (Windows 7).
Via File History
File History is the default backup and data recovery solution in Windows 11/10. It allows you to take automatic files and folders stored in the library. Here’s how to use it.
Step 1. In the search bar, enter Control Panel and open it.
Step 2. Choose System and Security > File History and choose Select a network location later or insert an external hard drive or USB flash drive.
Step 3. Click Turn on to enable File History and refresh the window. Then File History will start backing up your files.
Via Backup and Restore (Windows 7)
Backup and Restore (Windows 7) is a feature that is left over from Windows 7 and still works just fine in backing up individual files and folders. Here’s how to get started.
At the beginning, open Control Panel > click on System and Security > select Backup and Restore (Windows 7).
# Create a Windows 11 image backup for the system
Step 1. Click on Create a system image and then choose a backup location to save the system image, including a network location, an external hard drive, or DVD.
Note: For this feature, the USB drive is an invalid backup path.
Step 2. Since the system-related partitions have already been selected, just click on Next and hit Start backup after confirming the backup settings.
#Backup Files in Windows 11 via Set up Backup
Step 1. Click Set up backup > select a backup destination > hit Next.
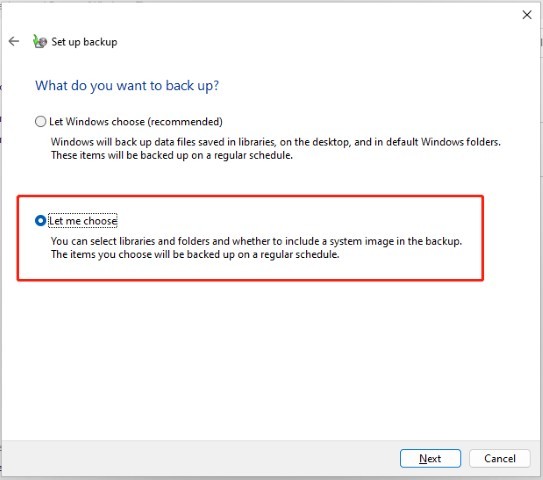
Step 2. Decide what you want to back up and pick Let Windows choose or Let me choose. Here we choose Let me choose.
Step 3. Check the box next to the items you want to copy. If you don’t want to create a system image of Windows 11, just uncheck Include a system image of drivers. Then click Next > click Save settings and run backup.
To Wrap Things Up
In conclusion, we break down each step for using the three Windows 11 backup software (MiniTool ShadowMaker, Backup and Restore, and File History) to backup Windows 11. As you can perceive, MiniTool ShadowMaker, the free backup software can successfully complete backup tasks that cannot be completed by the snap-in software due to its flawlessness.
You should consider both the strengths and weaknesses of the software and your own needs to choose the best option. To be specific, MiniTool ShadowMaker is the easiest one for those who are not tech-savvy.
What's your reaction?


You may also like
-

Top 7 Data Science Courses in 2026
-
How Generative AI is Changing Content Creation
-
How I Stopped Stressing Over Lecture Notes (And Started Actually Learning)
-
How AI Video Clips Are Boosting Creator Earnings Online
-
Organic Flows: Designing Vine-Inspired Script with a Tattoo Font Generator for Ankle and Collarbone Curves
-
Top 10 Secret Locations to Grind Aion 2 Kinah Fast


Comments
0 comment